
When working with custom Lightning-combobox in LWC most of the time you will face problems making combo box a required field. When using a Lightning-record-edit-form, you usually use lightning-input-field tag and it takes care of all the FLS (Field Level Security) and irrespective of field type it handles every type of field. However, there will be scenarios where lightning-input-field may not be suitable and end up using a custom tag. For instance, a custom lookup field or multi select custom lookup field or a custom record type selection combo box. You end up using a custom solution for these.
Continue reading “LWC: Lightning-Combobox required field validation on submit button”Parent to child communication in LWC
For a parent component to communicate with child component, A child component exposes a property or method to make that variable publicly available. Then the parent can update the child’s public property or call child’s function.
To make a property or method public, LWC component will be annotated with @api. To expose a public method, decorate it with @api. Public methods are part of a component’s API. To communicate down the containment hierarchy, owner and parent components can call JavaScript methods on child components.

In the child to parent communication you can see in child component @api childName = ‘’ is declared. This is a small example of Parent to child communication. In parent component, when the child component is called, the @api annotated property is used to send information to child component.
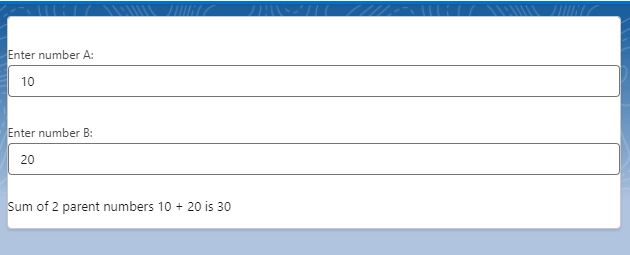
Today we will see how components methods communicate down the hierarchy i.e from parent to child using a small example. We will have 2 numbers in parent component which are passed to child. We will call a child method to add those 2 numbers and display the sum in child component. Just for reference Parent component name is Guru and Child component name is Chela (I have components names parent and child with previous examples).
guru.html (Parent component)
<template>
    <div class="slds-theme">
        <lightning-card  title={childName}>
        <lightning-input type="number"
                         label="Enter number A:"
                         value={value1}
                         onchange={handleValue1Change}
        ></lightning-input>

        <br/>

        <lightning-input type="number"
                         label="Enter number B:"
                         value={value2}
                         onchange={handleValue2Change}
        ></lightning-input>

        <br/>

        <c-chela value1={value1} value2={value2}></c-chela>
        </lightning-card>
    </div>
</template>
guru.js (Parent component)
import { LightningElement } from 'lwc';

export default class Guru extends LightningElement {
    value1 = 0;
    value2= 0;

    handleValue1Change(event){
        this.value1 = event.target.value;
        this.template.querySelector('c-chela').addNumbers();

    }

    handleValue2Change(event){
        this.value2 = event.target.value;
        this.template.querySelector('c-chela').addNumbers();
    }
}
Here, We have mentioned the child component in parent component and chela.js (Child component) and if you see this.template.querySelector(‘c-chela’).addNumbers(); in guru.js file, we are calling chela component’s addNumbers method from parent component guru.js
chela.html (Child component)
<template>
    <div class="slds-theme">
        Sum of 2 parent numbers {value1} + {value2} is {sum}
    </div>
</template>
chela.js (Child component)
import { LightningElement, api } from 'lwc';

export default class Chela extends LightningElement {

    @api value1 = 0;
    @api value2 = 0;
    sum = 0;

    @api
    addNumbers(){

        setTimeout(() => {
            // adding 2 parent component numbers value1 and value2
            this.sum = parseInt(this.value1) + parseInt(this.value2);
        }, 300);

    }
}
Output:
Child to Parent Communication in LWC
For a child component to communicate with parent component, A child component dispatches a custom event that triggers an update in the parent component. While sending an event to parent component, you can choose to send data and you can allow the event to bubble up through DOM. Along with an event, you can send custom information and make use of that information to update something.

If you have used custom lookup component in LWC, this component works on Child to Parent communication, where a user selected record is dispatched as an event to parent component where it is captured and shown as a pill. This is just a small example.
In this blog we will see how to use the custom event method with a small example.
We have 2 components here
1)Parent component
2)Child component
parent.html
<template>
    <lightning-card  title="Hello this is Papa Cpmponent">

        <p class="slds-p-horizontal_small">
            <lightning-input  type="text" label="Name" value={Name} read-only="true" ></lightning-input>
            <lightning-input  type="text" label="Actor" value={Actor} read-only="true" ></lightning-input>
            <lightning-input  type="text" label="Movie" value={Movie} read-only="true" ></lightning-input>
            <lightning-input  type="text" label="Punchline" value={Punchline} read-only="true" ></lightning-input>

        </p>

        <div slot="footer">
            <div class="slds-grid slds-gutters">
                <div class="slds-col">
                    <c-child-comp child-name="Raju" oncharacterinfo={handle_Details}>
                    </c-child-comp>
                </div>
                <div class="slds-col">
                    <c-child-comp child-name="Vicky" oncharacterinfo={handle_Details}>
                    </c-child-comp>
                </div>
                <div class="slds-col">
                    <c-child-comp child-name="Baburao" oncharacterinfo={handle_Details}>
                    </c-child-comp >
                </div>
              </div>
        </div>
    </lightning-card>
</template>
parent.js
import { LightningElement } from 'lwc';

export default class Papa extends LightningElement {
    Name;
    Actor;
    Movie;
    Punchline;

    handle_Details(event){

        console.log(JSON.stringify(event.detail));

        this.Name = event.detail.a_Name;
        this.Actor = event.detail.a_Actor;
        this.Movie = event.detail.a_Movie;
        this.Punchline = event.detail.a_Punchline;

        console.log ('-=-= name: '+this.Name);

    }
}
If you observe papa.html file. I have used a lightning card, with body and footer.
The body part will only display details that we receive from child component
Footer part has child components which is used 3 times representing 3 different movie character.
childComp.html
<template>
    <lightning-card  title={childName}>

        <lightning-button
            variant="brand"
            label="Check Details"
            onclick={handleClick}
        ></lightning-button>

    </lightning-card>
</template>
childComp.js
import { LightningElement,api } from 'lwc';

export default class ChildComp extends LightningElement {
    @api childName = '';

        Name = '';
        Actor = '';
        Movie = '';
        Punchline = '';

        handleClick(event){
            console.log('child click event: '+event);


            switch (this.childName) {
                case 'Raju':

                this.Name = 'Raju';
                this.Actor = 'Akshay Kumar';
                this.Movie = 'Hera Pheri';
                this.Punchline = 'Paisa hi paisa hoga!';

                break;

                case 'Vicky':

                this.Name = 'Vicky Chopra';
                this.Actor = 'Amitab Bachchan';
                this.Movie = 'Sharabi';
                this.Punchline = 'Mooche Ho Toh Nathulal Ji Jaise Ho... Varna na ho';

                break;

                case 'Baburao':

                this.Name = 'Baburao Ganpatrao Apte';
                this.Actor = 'Phir Paresh Rawal';
                this.Movie = 'Hera Pheri';
                this.Punchline = 'Uthala le re baba';

                break;

                default:

                break;

            }

            console.log('-=-= in child: '+this.Name);
            console.log('-=-= in child: '+this.Movie);
            console.log('-=-= in child: '+this.Actor);
            console.log('-=-= in child: '+this.Punchline);

            const a_Name = this.Name;
            const a_Movie = this.Movie;
            const a_Actor = this.Actor;
            const a_Punchline = this.Punchline;

            const selectedCharacter = new CustomEvent('characterinfo', {
                detail: {
                    a_Name,
                    a_Movie,
                    a_Actor,
                    a_Punchline
                },
            });
            this.dispatchEvent(selectedCharacter);

        }
}
If you see child component’s html part. I have just added a button to click and get details.
In childComp.js file, button click event, Based on name of the child component, details will be fetched using switch statement.
This is the place where you can add custom code and make some server calls to get any other details as per requirement.
I have used a constant called selectedcharacter which is a custom event.
const selectedCharacter = new CustomEvent('characterinfo', {
                detail: {
                    a_Name,
                    a_Movie,
                    a_Actor,
                    a_Punchline
                },
            });
            this.dispatchEvent(selectedCharacter);
here, if you observe ‘characterinfo’ that is the event name, you can replace it with any character that you want. Any name that you use in child component, in parent you must have an on as an event
If you observe how the component is called in parent component,
<c-child-comp child-name="Raju" oncharacterinfo={handle_Details}>
                    </c-child-comp>
name of the component is saved as childComp. while using the component in a parent component, there will be no CAPITAL case for any character, if there is a Capital case, it will be replaced with -<small case of same character>. In above example, childComp, here C is capital so while using in parent compnent, we have to mention -c. that is the reason we have used <c-child-comp >
oncharacterinfo ={handle_Details} is used for custom event details. If you use custom event as moviecast, then in parent component you must use onmoviecast as event name and call a method to handle that event.
If you observe the child component, you see detail as a variable, this is a event property, you can also use details as event property. Please note, you cannot use any other variable, you have to be specific and it should be one of the property of event.
Output


Communication Between Components using LWC
There will be multiple scenarios where developers work with multiple components, including nested components within a component. It’s important to understand how components communicate with each other. Each component is a separate entity with its own variables, events, HTML design, and the ability to communicate with the server (APEX) individually. However, it’s crucial to note that in certain situations, components need to communicate with each other. This approach can save processing time by preventing each component from making a server call every time there is a change in data.
A component within a component creates a parent-child relationship. How a parent component communicates with a child component is completely different from how a child communicates. And both are completely different from how unrelated component communicates.
There are 3 different types of communication that we come across.
1) Child to Parent Communication
2) Parent to Child Communication
3) Unrelated components (Separate components).
We will discuss all the scenarios with examples.
1) Child to Parent Communication
2) Parent to Child Communication
3) Unrelated components (Separate components).
To communicate across subtrees in a DOM we use a concept called Lightning Message Service(LMS).
Note:
Step-by-Step Guide to Creating E-Commerce Portals with Titan for Salesforce
Taking your commerce efforts digital is a great way for your business to expand its reach and enhance the customer experience. Selling your products face-to-face can only get you so far in today’s digital climate. Not only is the traditional method time-consuming, but it also limits your reach to customers. Going online means that many customers can interact with your e-commerce platform at once from across the globe. You can also create separate platforms for selling your products to customers and businesses. By tailoring the experience per customer type, you can assure an enhanced experience that keeps your business profitable.
Leveraging the power of your Salesforce CRM data to build a powerful e-commerce platform can meet the needs of B2B and B2C transactions. This guide aims to walk you through why you should choose Titan as the tool to build your B2B e-commerce portals, provide you with a breakdown of e-commerce Salesforce portals, and cover how Salesforce can enhance your B2B e-commerce.
What are E-commerce Portals?
E-commerce portals are digital platforms that facilitate the buying and selling of your goods and services. You can consider these dynamic e-commerce portals as virtual storefronts where you can display your products and services for customers to browse. Perfect for facilitating your business-to-business (B2B), and business-to-consumer (B2C) transactions. Creating Salesforce e-commerce platforms offers the convenience of shopping from anywhere at any time. Key features of e-commerce platforms include secure payment gateways, detailed product listings, user-friendly interfaces, shopping carts, inventory management, and order management systems.
How to Create an E-commerce Portal
Creating your e-commerce Salesforce portal can seem like a daunting task. We’ve created a general guide for you to follow to design, develop, and launch your B2C and B2B e-commerce portals. These steps will differ depending on your specific Salesforce edition or if you have chosen a third-party solution.
- Start with your planning and research. Decide what products and services you want to sell and who your target audience will be. At this stage, you will need to determine whether you are creating a B2C to B2B e-commerce platform. Consider the type of revenue model you will use such as direct sales, commission, or subscription.
- Choose your e-commerce platform while considering customization options, scalability, cost, and ease of use.
- Decide on a domain name that is both easy to remember and relevant to your business. Ensure you choose a reliable hosting provider that can handle your anticipated traffic.
- Design your portal ensuring your interface is easy to use and intuitive. Visitors should be able to smoothly navigate through the checkout process without having to contact your business for assistance. Your website should align with your business brand for a cohesive experience.
- Customize the platform to suit your business needs. Include product listings with detailed descriptions, high-quality images, inventory information, and pricing. Integrate secure payment options. Set up shipping methods and include tax calculations based on the customer’s location.
- Implement security measures to protect your customer’s data and ensure your portal has an SSL certificate.
- Test your portal before launching. Conduct rigorous testing to ensure your product search, checkout, payment processing, and order management work correctly. Test portal performance under different traffic conditions to ensure the user experience is not affected.
- Launch your portal and make it accessible to the public. Keep an eye on the performance of your website and make any necessary changes to keep your performance optimal.
- Optimize your portal using search engine keywords so your portal pops up when users search for it. Use marketing efforts to promote your portal and drive traffic to the site.
- Use analytics tools to track user behavior, metrics, and sales. Provide customer support to handle customer queries and resolve their issues promptly.
Creating an e-commerce portal requires careful consideration and planning. Consult your technical experts throughout the process to create a robust and successful e-commerce platform.
Titan Enhances Salesforce B2B Commerce Cloud
Titan is the top Salesforce e-commerce solution on the market. Offering robust customization capabilities, you can enhance your Salesforce e-commerce B2B portals to deliver exceptional and tailored experiences. Using Titan, you can create B2B Salesforce e-commerce clouds without needing to know any code. This means you become the technical expert and have the power to build your own e-commerce portals minus needing expensive custom development solutions.
Features of Titan’s E-commerce Portal
Let’s highlight some of the key features of this powerful Salesforce e-commerce platform builder. Titan offers a drag-and-drop interface so you can create and modify your pages, workflows, and forms without any coding knowledge. You can choose from a variety of customizable themes and templates to make the design process easier. These templates are launching pads so you don’t need to start from scratch. Unlike other tools on the market, the templates are completely customizable so you can change and edit them to match your company branding.
You can create custom workflows that handle order processing, customer service, and inventory management. These processes eliminate the need for manual intervention which saves your business time and enhances the user experience by providing consistent outcomes.
Rest assured that your data remains protected, the Titan web app is 100% secure and compliant with HIPAA, SOC 2, ISO, GDPR, and other leading frameworks. Titan is also fully accessible and meets all requirements outlined in section 508.
Offering advanced analytics and reporting capabilities, you can track the performance of your Salesforce e-commerce solution. Overall, Titan is Salesforce for e-commerce made simple.
Flawless Salesforce Integration with Titan’s Solutions for Salesforce
Titan’s solutions for Salesforce offer seamless integration with your e-commerce portals to enhance the Salesforce platform. Integrating your Salesforce CRM data with your e-commerce portals ensures you deliver tailored experiences to enhance your sales efforts. Titan’s integration guarantees enhanced data management, advanced analytics, and reporting capabilities as well as strong security and compliance for your e-commerce portals. The benefits of implementing Titan include streamlined operations, increased productivity, cost-effectiveness, scalability, and improved customer experiences. If you are looking to take the Salesforce E-Commerce Cloud to new heights, try Titan!
Using OCR Technologies in the Salesforce Ecosystem
Imagine a world where you never have to dig through those archive paper documents again to find that one document. Digitizing your documents instantly and accurately while seamlessly integrating the information in your CRM system may seem like a pipe dream. Say hello to the future with Optical Character Recognition (OCR) software.
OCR for Salesforce is a complete game changer by revolutionizing how businesses handle data. You can convert scanned paper documents, PDFs, and images captured by a digital camera into editable and searchable data. Salesforce OCR not only minimizes the need for manual data entry associated with the risk of human error but also accelerates the process.
By implementing OCR in your Salesforce instance your sales team can instantly capture client information from business cards or your support team can upload information from customer correspondence. The possibilities are endless and the benefits are instant. In this article, we will delve into the definition of OCR technology, the benefits of integrating OCR in Salesforce, and cover some key OCR solutions that are compatible with Salesforce.
Definition of OCR Technology
So we’ve briefly covered that Optical Character Recognition is the method that converts your documents into searchable and editable data. Essentially, OCR extracts the text within an image or document and transforms it into machine-readable text.
Here’s a brief overview of how OCR typically works:
- First, you will need to capture an image of your document, scan it, or even use your smartphone. Remember that the quality of your image will affect how accurate the OCR process is so ensure your scan is as clear as possible.
- The image undergoes preprocessing steps to improve recognition accuracy. These steps can include noise reduction, correcting tilted text, enhancing the contrast, and even converting the image to black and white.
- The software will analyze the image and identify the text characters. Each character, word, and line is segmented and then compared to a database of known characters. Algorithms are used such as feature extraction or pattern making.
- Once the text is recognized, it will undergo post-processing to correct potential errors and enhance accuracy. The software may refer to dictionaries for spelling errors and use text-based algorithms to assist with word recognition.
- The captured data is machine-readable text that you can search, edit, and index. This final output can be exported to various formats including plain text, documents, and most importantly inputted into your CRM system to grow your database.
OCR is invaluable for enhancing your operational efficiency, reducing the need for manual input, and improving your data accessibility. Keep reading to find out more about the benefits of using OCR in Salesforce and Salesforce Optical Character Recognition solutions.
Benefits of Integrating OCR in Salesforce
Integrating Optical Character Recognition in your Salesforce ecosystem can offer your business numerous benefits. We’ve covered the native Salesforce OCR tool and highlighted a few of the key advantages for you to consider.
Salesforce Einstein OCR
Salesforce Einstein OCR is the fully integrated AI-powered optical character recognition software within the Salesforce ecosystem. Einstein OCR offers high precision and machine learning to constantly improve its recognition capabilities. Due to being a native Salesforce OCR solution, Einstein integrates seamlessly with all other Salesforce applications for an efficient workflow. Einstein OCR can be applied in your sales processes by capturing lead information efficiently. Improve your customer service efforts with quick data retrieval. Automate the entry of your invoice and receipt data for all things finance. Enhance your marketing efforts by providing accurate data that can be used for audience segmentation.
Automation of Data Entry Processes
First up we have the reduction of manual effort, OCR automates the process of extracting data from documents and inputs it into your database. This means your team doesn’t need to spend hours painstakingly reading documents and typing the information into Salesforce, OCR does it all for you. Data is also captured quickly which saves you time and allows your team to immediately start working with the captured information instead of spending time capturing it.
Increased Accuracy and Efficiency in Data Capture
OCR goes under pre and post-processing to eliminate the likelihood of errors creeping into your database. Often with the traditional manual data capture process, errors can include typos or incomplete information being entered into your CRM system. You also can rest assured that your data will be uniformly formatted which is crucial for maintaining consistency and assisting with your content being easily searchable.
Improved Customer Data Management
By capturing customer data quickly and accurately, you can address and resolve customer inquiries promptly. You can provide customized and personalized customer interactions using the data that’s readily available at your fingertips. By using OCR to capture your customer data in one central location, you can gain a unified view of your customers.
Enhanced Compliance and Data Security
OCR software processes information securely so you can rest assured that your sensitive data remains protected. You can configure automated processes to ensure that your compliance measures are being followed each time data is extracted from a document.
Key OCR Solutions Compatible with Salesforce
There are multiple tools on the market that you can use for your Salesforce Optical Character Recognition processes. These tools are designed to enhance the data management processes for your Salesforce OCR. We’ve covered the native Salesforce Einstein OCR solution above and will provide you with a brief overview of three third-party tools that you can use for OCR in Salesforce below.
DocParser extracts data from any document, from PDF to Excel, and copies it to the location of your choice.
Rossum captures and exports large volumes of data using AI-driven OCR. Offering high accuracy and quick deployment.
Finally, we have Titan Files, a Salesforce Flows solution you can implement to streamline processes and enhance user flexibility. Titan offers OCR software that uploads any text directly to your Salesforce records in seconds. Whether you are working with receipts, passports, invoices, documents, certificates, or business cards the data will be captured efficiently and accurately.
By leveraging the capabilities of OCR solutions and combining them with your Salesforce CRM, you can improve your overall efficiency, accuracy, and performance.
